Standalone
This guide will help you install Investra web frontend on cPanel using Standalone mode.
What is Standalone?
Standalone is the full server-side Next.js build. In this mode, Next.js runs as a Node.js server and supports server-side rendering, API routes, middleware, and dynamic rendering. It requires a VPS, dedicated server, or a platform that supports Node.js. Standalone cannot run on shared hosting like cPanel unless Node.js is available and properly configured. The main advantage of standalone is that all admin panel changes, such as settings, SEO, or feature toggles, are applied instantly without rebuilding the frontend. Pages are rendered on request, which allows dynamic content, authentication-based rendering, and real-time updates. While it is slightly slower than pure static HTML, it provides much more flexibility.
Note: We do not recommend installing Investra on cPanel as Standalone. You can use Vercel or Netlify or other platforms like AWS, Digital Ocean, Azure, VPS. Or you can follow the static-export method.
Prerequisites
Before you start, make sure you have the following installed on your cPanel:
- Ensure that the cPanel supports Node.js and version is 22 or higher.
Step 1: Upload the Files
-
Extract the investra Project that you have downloaded from CodeCanyon.
-
On that folder you will find another 2 folders called documentation and core folder.
-
Extract the core folder and now you will get four zip files called
admin.zip,standalone-client.zip,static-client.zipandmobile.zipon core folder. -
Now upload the standalone-client.zip in your cPanel.
Step 2: Upload Process
-
Login to your cPanel.
-
Navigate to the Files Manager section.
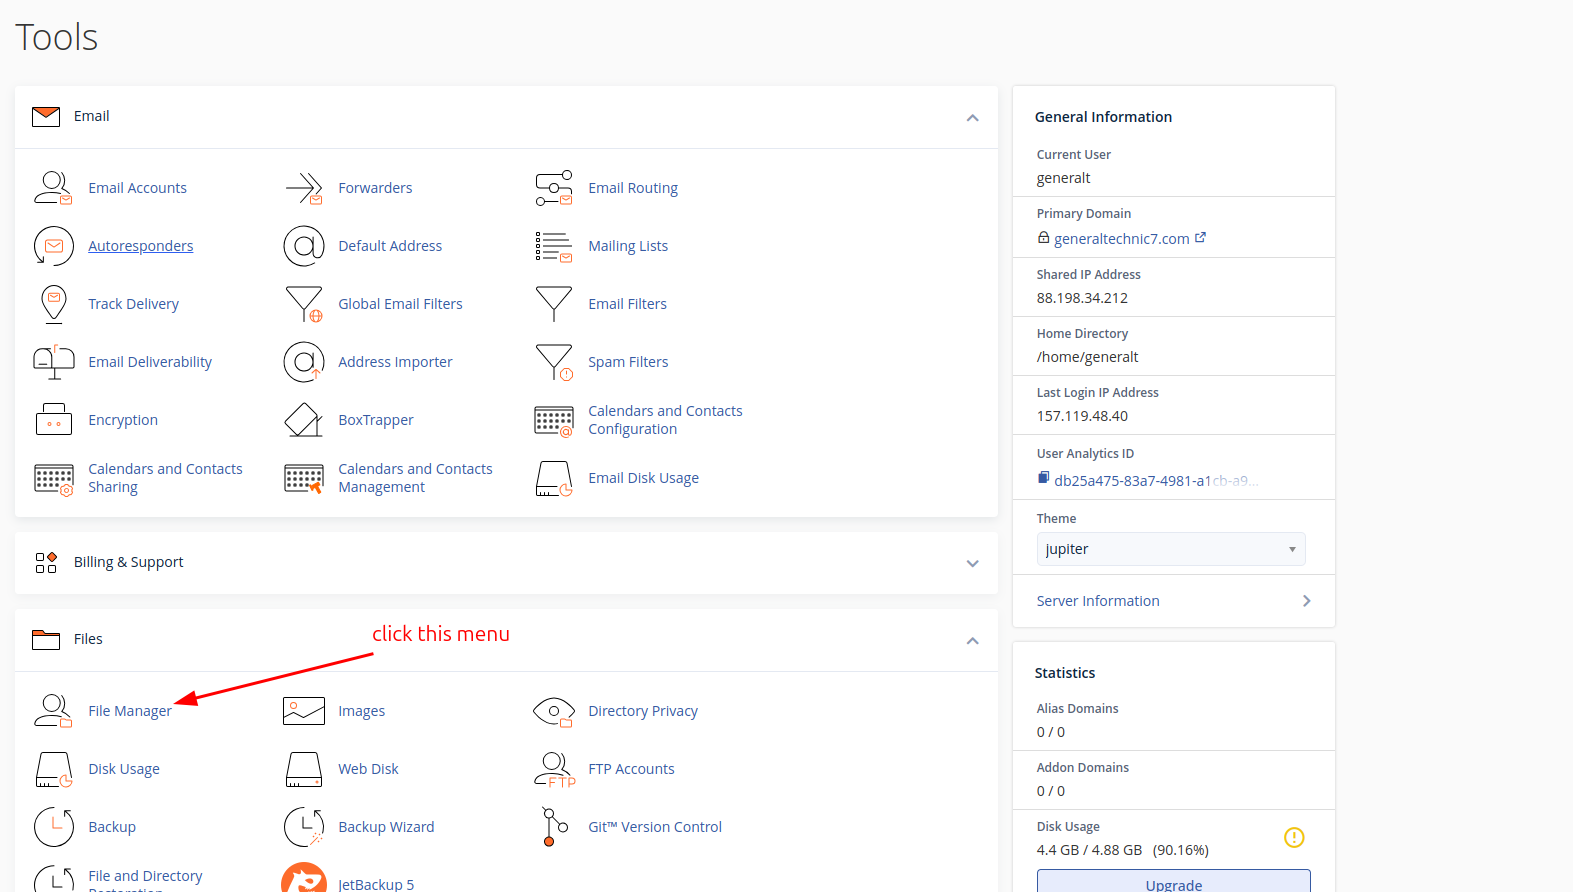
- Select public_html folder.
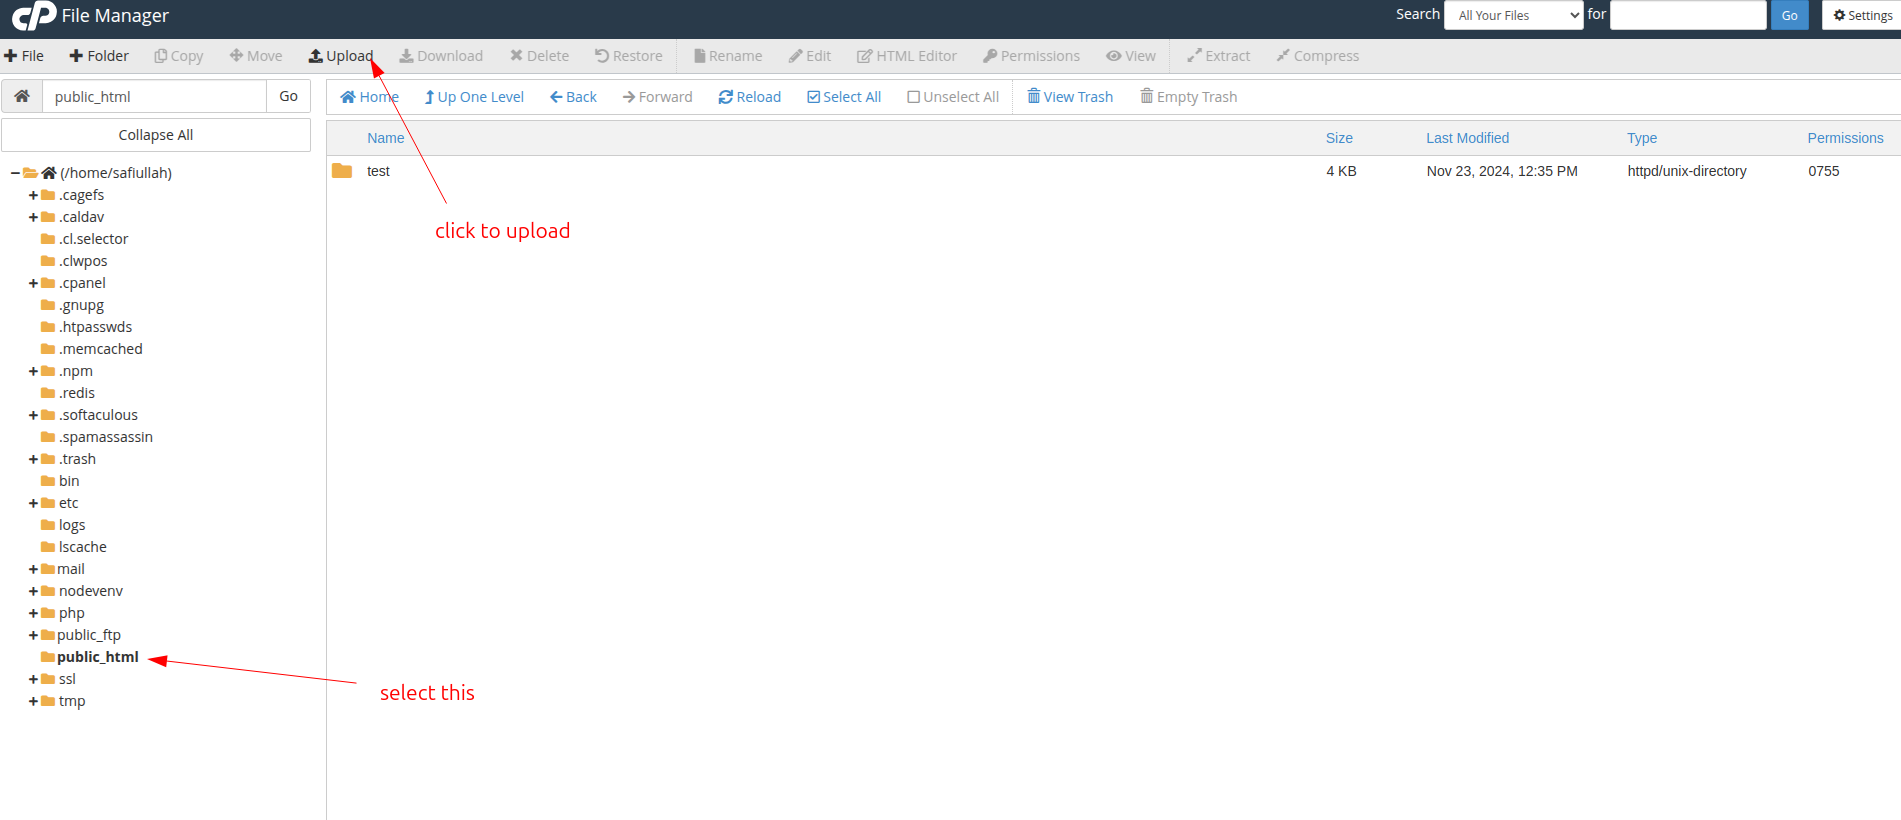
- Upload the zip file to the public_html folder. for example: /public_html/investra/client.zip
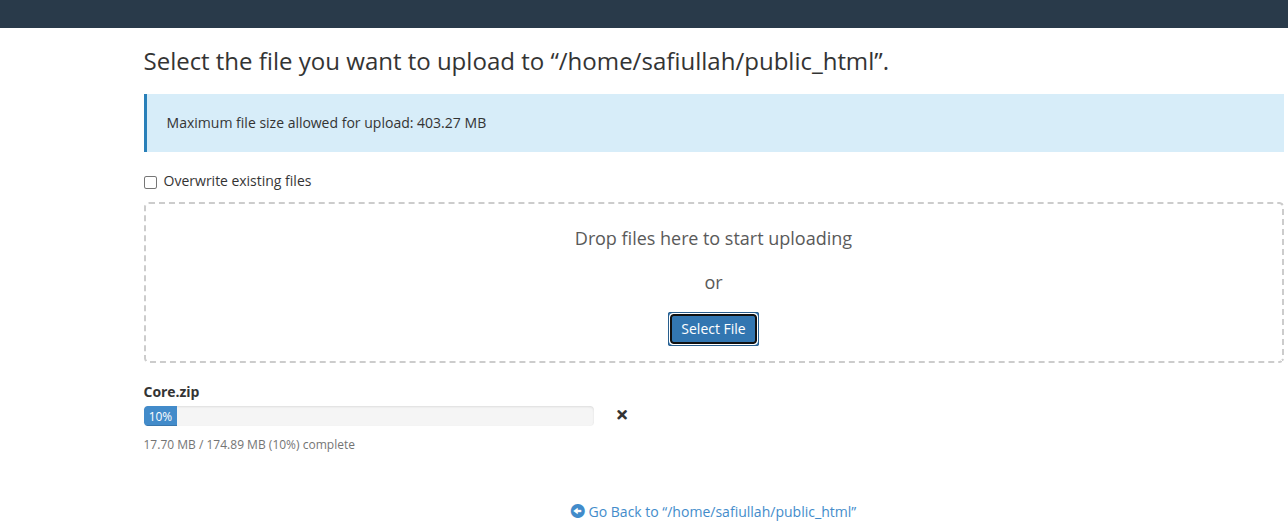
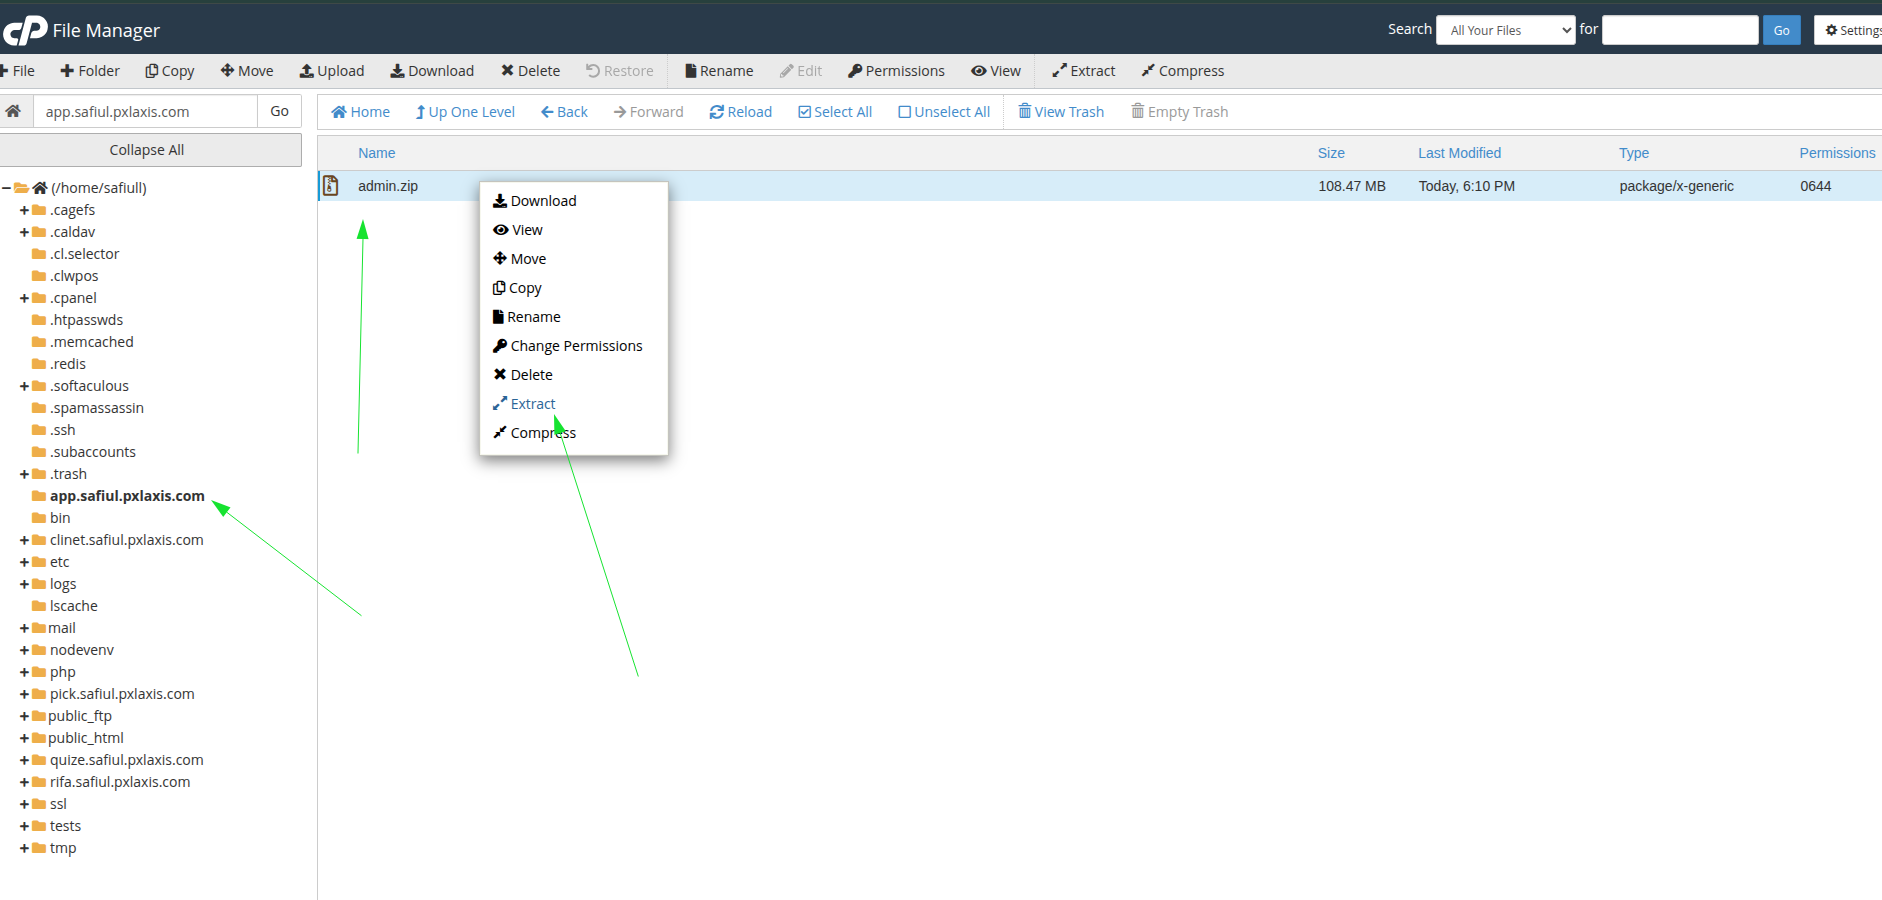
- Extract the zip file.
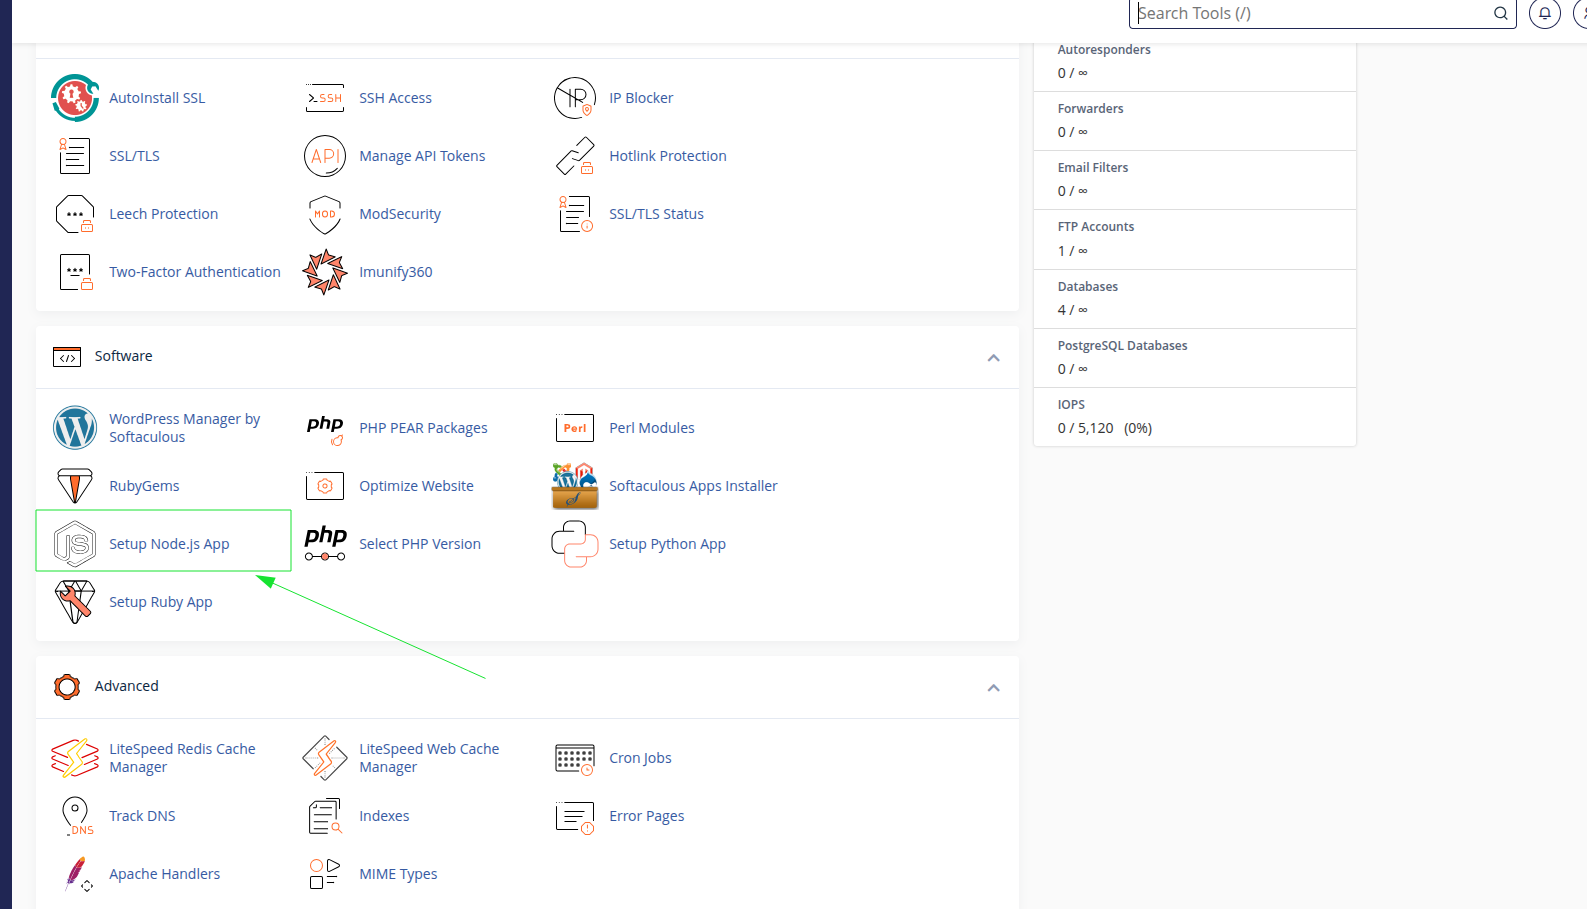
Step 3: Setup Node.js Application
- Go to the cPanel root page and click on the "Node.js" section.
- Click on the "Add Application" button and then click on the "Create Application" button.
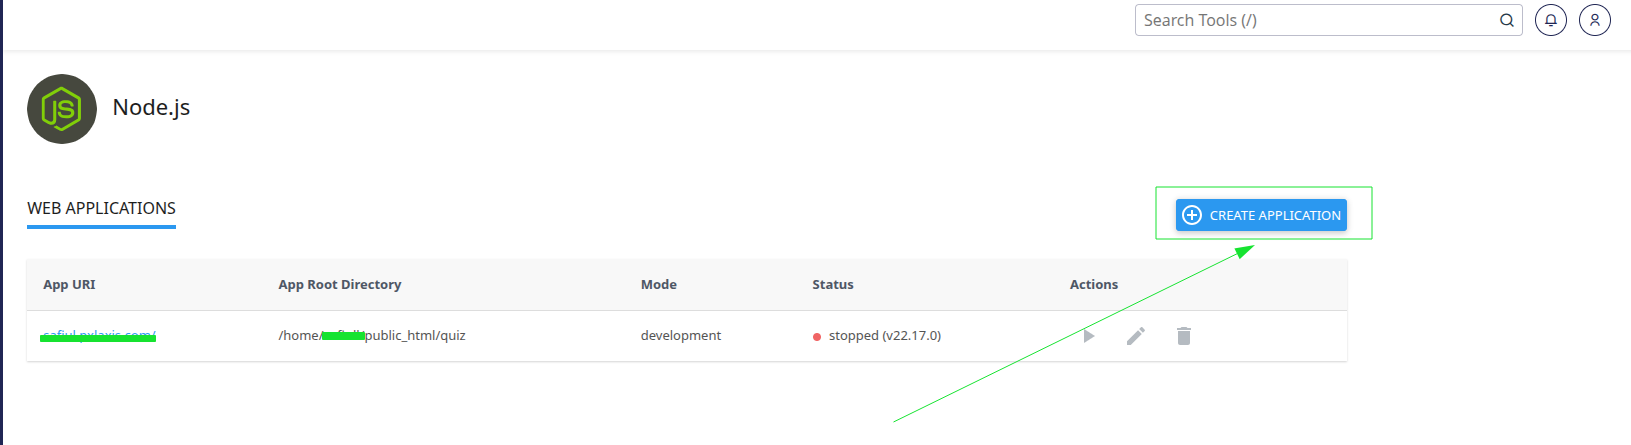
- Create an application name and then click on the "Create" button.
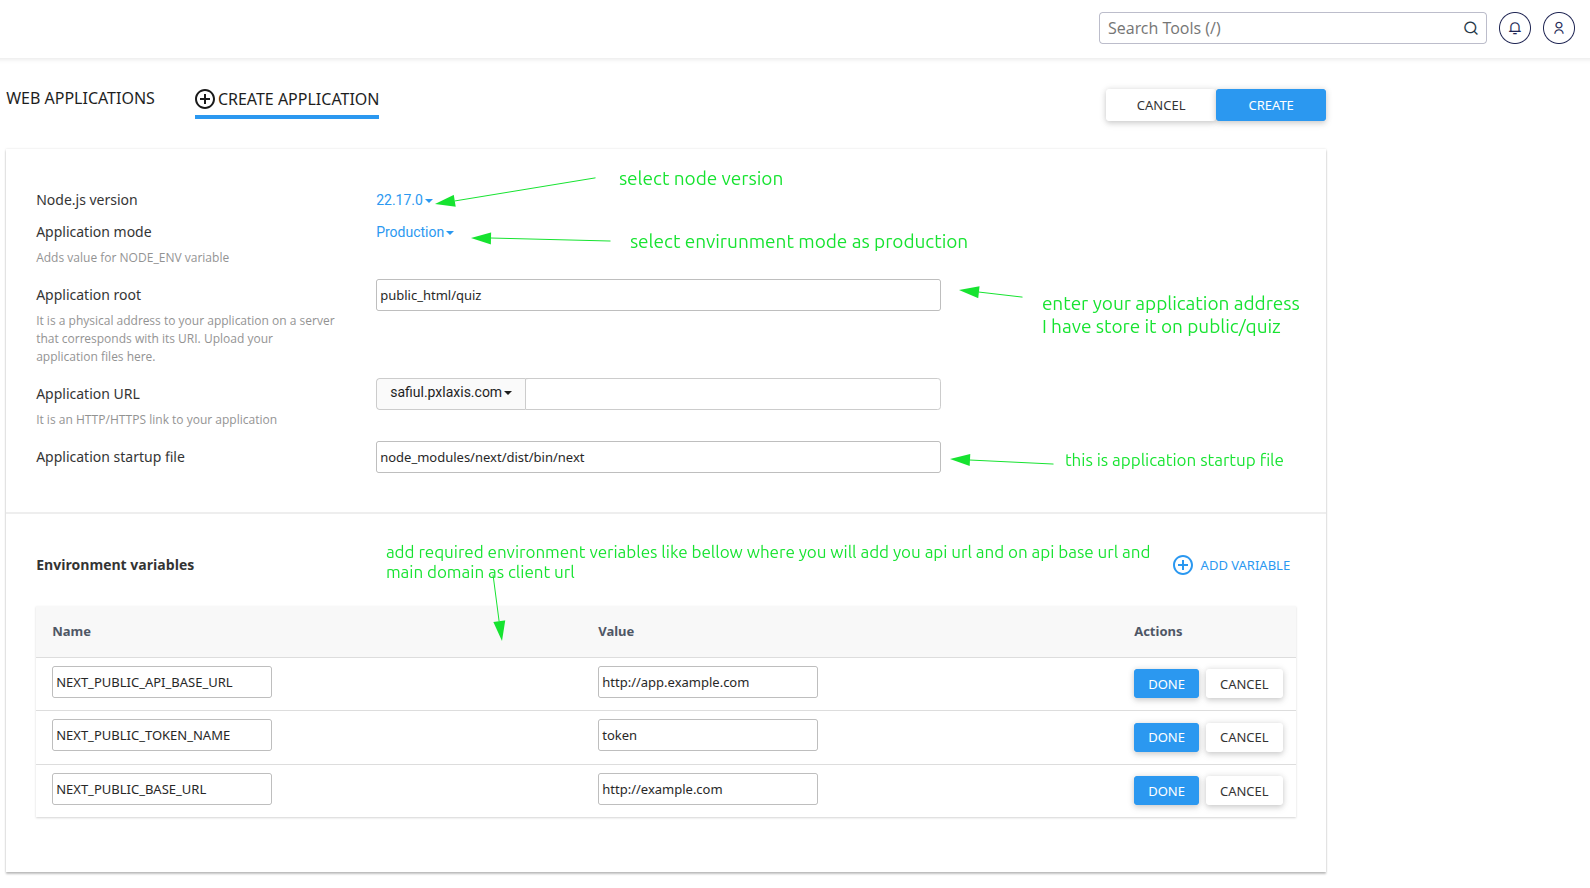
Before you click on the "Create" button, you need to follow the instruction.
- Select the Node.js version. 22 is recommended.
- Application mode as
production. - Application
rootaddress as/public_html/investra. In this investra folder you have to put the client file. - Select application domain as
investra.com. Which main domain. - enter application startup file as,
node_modules/next/dist/bin/next
- Now add all the required environment variables. For example,
NEXT_PUBLIC_API_URL=https://your-backend-url.com #required
NEXT_PUBLIC_TOKEN_NAME=token
NEXT_PUBLIC_ASSET_URL=https://your-backend-url.com
- Click on the "Create" button.
-
Install the dependencies by running the following command:
follow the below steps to install our investra project.
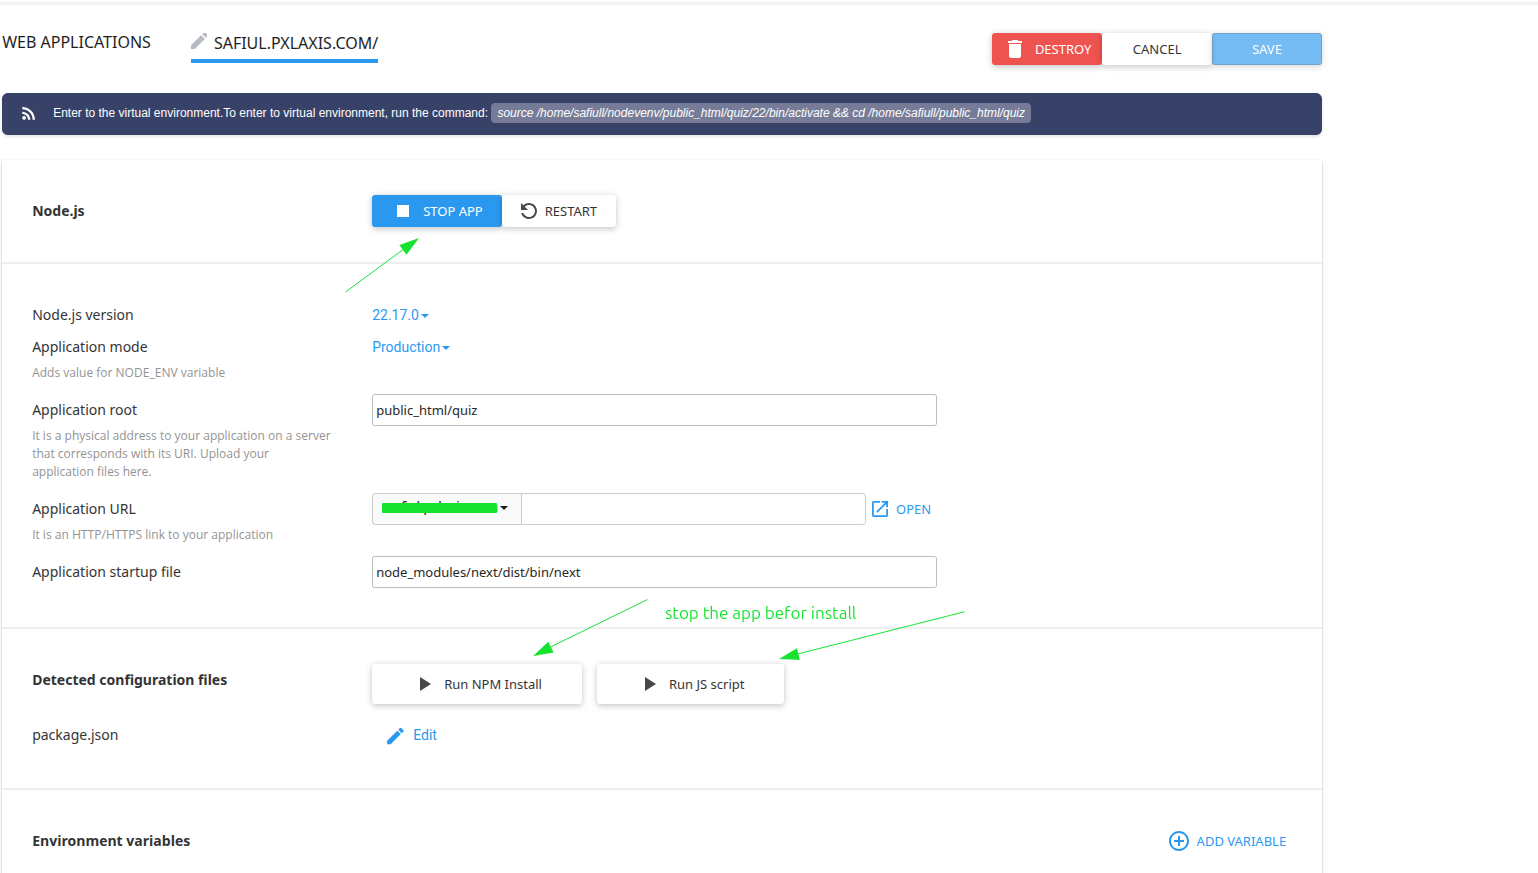
Now if the application is installed successfully, then you can serve the application from your main domain.
Conclusion
All the required steps are completed then you will be able to serve your application from your main domain. But cPanel is not familiar with Next.js, so we recommend if you face any problem then upload it on Vercel and it is very easy. Further you can contact our support team.